Category: Sewing

miss dolly

Say hello to miss dolly!

miss dolly

She was made from a miss buttons ‘sew your own’ kit. The fabrics and button all came with the kit, and the instructions are easy to follow. Annette named her “dolly”, because that’s what she calls almost all of her dolls. Um yeah, need a bit of work on more imaginative names here. But when she says “I want dolly”, she knows exactly which one she means, of course.

Here is miss dolly again, with a small child for scale.

Bags factory

Bags, bags, bags

I recently made these bags for a friend’s kids. I’ve been admiring Sally Shim‘s patchwork (like this and this), and I thought I’d try my hand at some patchwork bags. I love these bags, they were hard to give away. I’m glad the kids and their mum loved them too.

These bags were fun to make. Just simple lined totes, nothing complicated, but hopefully will be useful. Patchwork on one side, and a matching pocket on the other side. As the main outer fabric I used a linen-look cotton fabric called Osnaburg, and some fabrics from stash for the patchwork. Choosing fabrics was both fun and very difficult at the same time. Fun because of all the possibilities of fabrics that I can match that would look good together. Difficult because of all the possibilities — “this looks good with that, but it looks great with that other one too!” I get so indecisive sometimes. It seems that I always love other people’s fabrics combo or yarn colour choices, but when it comes to my own projects I spend so much time fretting about whether the combinations would work!

Anyway, here are the bags in more detail. Click the pics for bigger.

Tote 1:

Tote 1Tote 1 pocket

Tote 2:

Tote 2Tote 2 pocket

Tote 3:

Tote 3Tote 3 pocket

Tote 4:

Tote 4Tote 4 pocket

More Sewing

There had been a flurry of sewing here lately. First there are these bears.

Bear Friends

These bears were made from a pattern in a japanese craft book, ISBN 4579109783, that I got from Kinokuniya a while ago. They’re my first foray into sewing softies, something I have been wanting to do for a long time. The brown and white gingham bear was the first one I made, he has so many flaws that are too embarassing to mention (including arms that got ripped out because the fabric frayed, and had to be re-sewn back in). But I’m getting better I think. And I love these bears to bits. (Okay, so they’re for Annette, but I wanna play with them too!)

Next we have a Market Bag, another project from the Crafter’s Companion. Pattern is by Anna Torborg. I used Alexander Henry’s Sunny Side print, and some cream-coloured brushed cotton.

Market Bag

It’s basically a large tote, with a drawstring near the top.

Market Bag

I had planned to do some embroidery on the cream-coloured fabric to break up the plainness, but then I got impatient and just wanted to sew up the bag so that I could see what it looks like, so no embroidery. But now that I see it, I quite like it this way. Just simple. (Funny how when I’m sewing I’m very impatient, wanting to see the result as soon as possible, but when I’m knitting I’m happy to spend weeks or months on the same project. I still have a lot to learn, I guess.)

And finally we have a twirly skirt, which I made using the tutorial from house on a hill road. I used some Hello Kitty fabric that Corrie gave me. This skirt is so easy to make, and Annette loves twirling in it. I have already planned to make more for her.

Twirly Skirt

Up to no good

Thank you for the lovely comments on the scarf! ๐Ÿ™‚ My brother in law seems to like it too. (He’d better like it! ๐Ÿ™‚ )

Here’s something else I’ve been up to…

Work basket

The inspiration for this basket came from the cover of this issue of Cotton Time (the cute basket at bottom left corner, only I made mine bigger) and this fabric basket from the Crafter’s Companion book. I’m so very happy with this, it’s like a combination of my favourite fabrics of the moment.

Dimensions: 11 inches tall, 10 inches diameter. It’s big enough to carry all my knitting WIPs (well, the ones in active rotation anyway), so that they’re not all over the living room. Hubby is also pleased with this basket, he’s particularly enthusiastic about being able to find a place to sit again ๐Ÿ˜‰

Sides and bottom fortified by Timtex. No more floppy sides this time!

It has a drawstring top…

Drawstring top

… and lots of pockets on the inside. For needles, notions, etc.

Pockets

Winging it

The baby hat has been finished, blocked, and gifted. Tada!

Little cables hat

Pattern: My own. Also known as the “figure it out as I go” pattern. Added: Pattern is now here.

Yarn: Debbie Bliss Baby Cashmerino colour #340202 (baby blue), less than 1 ball.
Needles: 3.25mm DPNs.

Well, not too shabby I’d say. At first I was just going for a plain stockinette hat. Then I thought about adding those little cables just to add a bit of interest to it.

Little cables

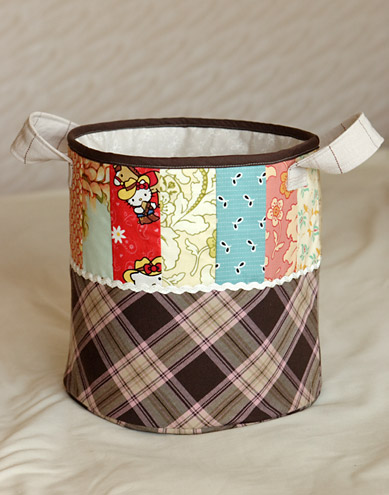
And on the sewing front, I made this bag for Annette to take to crรƒยฉche. I made her this little bag a while ago, which she loves, but now I realise that it’s getting too small for the stuff that needs to be in the bag. It would fit a lunch box and a water bottle, but no space for say, raincoat or change of clothes. Hence this new bag.

Boxed bag

The idea for this bag started with me seeing this trim box tutorial by Melissa from all buttoned up, and then seeing this boxed bag in her archives, and a plan was hatched. I basically just followed the trim box tutorial, minus the Timtex, adjusted the dimensions (this bag is about 25cm long, 20cm wide, and 25cm high, or 10 x 8 x 10 inches), and added front pocket and straps.

I’m very pleased with the bag, even though there are lots of room for improvement.

Close up

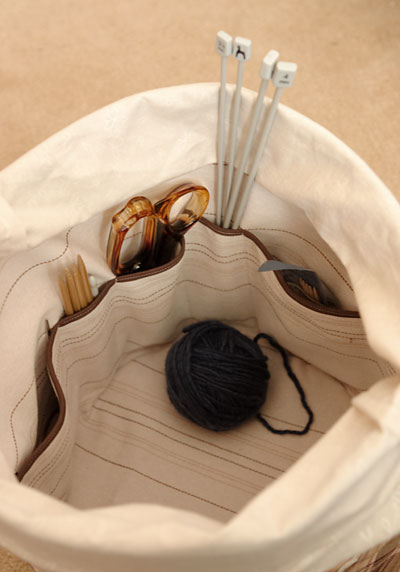
This hand stitching on the felt took me longer than putting the rest of the bag together.

Opened

And whoops, rather flimsy sides! It’s ok, actually, but next time I might consider using some interfacing.

Boxed bag